Today I am making a cucumber gazpacho, a loaf of bread, some salad dressing...i think that is about it. I need to start spreading out and getting some more clients, which means I need to start marketing myself. I have been on the practice course for a few weeks and am ready to move onto the main course, so to speak. This involves working on some business cards, actually coming up with a name, making a full website...all exciting things, right?
So I need some help with names. When I was thinking of starting a pie business, I was going to name it "Pi" and use the symbol, which I am sure has been used, because there is no way that I am the first person to think of that. But now I am doing a much wider range of things, so I am not sure if just the word Pi would be a good choice. My FAVORITE word in the world is Tangerine. I just love the way it sounds. Say it with me, tangerine. Taaan-jah-reeeeeeeeen. Awesome sauce, right? So things that fly around my head are things like Tangerine Pi, but that might still be too niche sounding, right? Maybe not. Tangerine. Maybe just Tangerine?
Things I don't want in the name: Alexandria (where I live), Modern, Cuisine, Simple, Fancy, Upscale, Home, Cook...and probably a gazillion more.
The name is the first thing I need, right? Once that happens, the rest kind of falls into place and follows. Cards, site, marketing...
So throw me some random words, my peeps!
Thursday, March 22, 2012
Friday, March 16, 2012
Rough Week!
Actually, rough two weeks, but back on track. Sick dog, on the mend now, so was a little slow on the updating. Will be back on schedule soon!
BUT to prove that things are afoot, here are pictures of my seedlings, which will be planted in our newly expanded garden soon, which will mean...YUMMY SPRING AND SUMMER FOOD!


BUT to prove that things are afoot, here are pictures of my seedlings, which will be planted in our newly expanded garden soon, which will mean...YUMMY SPRING AND SUMMER FOOD!

Squash and Cukes, and maybe some Okra

TOMATO and PEPPER PLANTS!
You say you want the full list? Oh boy. Here it is:
TOMATOES (in Rainbow-ish order)
Ace Bush
Rutgers
Sugar Cherry
Old Virginia
Chadwick Cherry
Caspian Pink
Pink Accordion
Henderson's Pink Ponderosa
Violet Jasper
Copia
Orange Fleshed Purple Smudge
Illini Gold
Big White Pink Stripes
Reisetomate
Big Rainbow
Orange and Green Zebra
Hssiao His Hung Shih
Egg Yolk
Huge Lemon Oxheart
Green Sausage
Green Doctors
Grandma Olivers Green
Kiwi
Great White
White Tomesol
Ivory Pear
Ananas Noire
Tsungshigo Chinese
Purple Calabash
Purple Robeson
Gypsy
Black Cherry
Prudens Purple
Sara Black
PEPPERS
Sweet Pepper Mix (which I kind of hate, not knowing what is happening)
Purple Pepper
Asti Rosso Red
Golden CA
Orange Sweet
Ozark Red
Chocolate Habenaro
Purple Jalepano
Jamaican Hot Chocolate (which are probably the same as the choc habs)
Hot Pepper Random Mix (see above, re: hating)
RANDOM
Okra
SQUASH
Yellow Summer
Black Beauty
Crookneck
Pattypan
Golden Scallop
Grey Zucchini
Ronde de Nice
Squash Tondo Scuro di Piacenza
Random Mix
CUKES
Reg Cuke
Lemon Cuke
White Cuke
Crystal Apple Cuke
Mexican Sour Gherkin
MELON
Banana Melon
EGGPLANT
Japanese White Egg
Lao Green Stripe
Black Champion
Purple Stripe
FUN FUN FUN FUN!!!!!! I have a few other things I am considering (radishes and beets go directly into the ground, and I prob could have held off on the squash and cukes for a few more weeks, but was getting antsy!)
Garden eating is healthy eating is fun eating!
Monday, February 27, 2012
Food Being Made This Week
Here is what I am cooking for people this week:
Italian Meatloaf (I have a feeling this will be popular)
Roasted Veggies (We will see what looks good)
Root Veggie Gratin (w/ Gruyere)
Something with Couscous, haven't decided yet.
Some Key Lime Pies
I also need to get a brisket to cure, since I want to make my own Corned Beef for St. Patrick's day. Mmmmm, corned beef.
Wednesday, February 22, 2012
Meatloaf, Italian Style
Meatloaf has always been one of my favorites, I absolutely went to school with meatloaf sandwiches on more than one occasion as a kid. And I have a high level of disdain for ketchup (blergh), which is not used in this recipe, although I am sure you can sub it out for the tomato sauce. I should also mention, this is modified from a recipe I read in Bon Appetit, from, of all places, Mario Batalli's father, who I believe runs a restaurant. This makes two loaves of meat, so cut it in half if you want less, but you can always freeze the second one. I would probably undercook it a little, and when thawing, take it out the day before.
What goes in:
2 lbs lean ground beef (15 to 20 percent fat)
1 lb grated fresh mozzerella (i usually put it in the freezer to firm it up a bit more, not more than half an hour)
1 lb sweet Italian sausage, crumbled, out of the casing
2 c fresh basil (as it was out of season, I used a little basil in a tube. Don't hate. About half a cup)
2 c fresh breadcrumbs (from bread you made! Kidding, I am trying to make up for the basil in a tube)
1 medium onion, chopped
1 c oil packed sun-dried tomatoes, drained, chopped
1/2 c diced red pepper
6 garlic cloves, chopped
1 1/2 tbsp dried oregano
2 tsp salt
1 tsp pepper
1 cup tomato sauce (1/2 for in the meatloaf, 1/2 for the top)
3 large eggs, beaten a little
1/2 c dry red wine (some examples of dry red wines are Zinfandel, Cab Sauvignon, Bordeaux, Pinot Noir, Côtes-du-Rhône. Also, DON'T COOK WITH A WINE YOU WOULDN'T DRINK!!! Or serve others. SERIOUSLY!)
MEATLOAF
OK, as always, get your stuff ready to go. I don't think I have talked about the importance of the mise-en-place (sounds like meez on ploss). This is a french term which literally means "stuff in place" and is invaluable in the kitchen. So get your stuff ready, your onions chopped, your garlic minced, your tomatoes cut up. Beat the eggs, pour the wine, grate your mozz. Getting into a mindset of making your mise-en-place and having it ready to use is a good way to cook.
The recipe didn't suggest cooking the onions, but after having made the recipe a few times, I decided I wanted a little caramelization in the loaf, so now I sauté the onions, the peppers, AND to merge the flavors a little, and mellow some of their strength, I throw in the sun-dried tomatoes. I cook them for just a little bit, getting a little color onto the onions. I don't add the garlic, it is small enough that it cooks pretty nicely inside the meatloaf.
Start combining! I let the cooked veggies cool a bit before adding them, but since it was going into the oven right away, no big deal, other than not wanting to burn my hands. At this point, you can turn your oven to 375°, and get your two loaf pans ready to go. More on that later. Mix all the non-liquids first, then take half the tomato sauce, the eggs, and the red wine and put them in and mix mix mix!
Don't over mix! It makes things tough!
Now for the pans, you can use them or not. This recipe filled two bread loaf pans, or you can do it free form on a baking sheet. Either way works. Just be shore, if you just make a loaf without a pan, there will be some oil and liquids coming out, so put some non-stick foil on the bottom of your baking sheet. Once they are formed, put the rest of the tomato sauce on the top of the loaves. Open the ovens, put in the loaves. Once you have let the loaves bake for about an hour and fifteen minutes, they should be done!! You can drain out the loaf pans once they have cooled.
YUM! Make a sandwich the next day with the leftovers! My favorite was always meat loaf sandwiches!
Tuesday, February 14, 2012
Happenings!
I dropped of my first meal for someone yesterday, which was pretty cool! It marks the first time I have made food and left it behind, like a little food baby. I was nervous, but received an email today saying how great the food was, AND had a follow up email from someone else in the office asking me to cook for a dinner party they want to have!
So for the first meal, I made meatloaf (it was requested) with mashed potatoes, gravy, and sauteed kale with some bacon. And she ordered for friday, mac and cheese, shrimp etouffee, pork bbq, and for dessert, key lime pie (one of my specialties). While I didn't take pics of the stuff I made earlier, I will post the recipe in a bit, as it is really good, and my kind of comfort food. And I will be sure to take pics of the stuff I make for friday.
So for the first meal, I made meatloaf (it was requested) with mashed potatoes, gravy, and sauteed kale with some bacon. And she ordered for friday, mac and cheese, shrimp etouffee, pork bbq, and for dessert, key lime pie (one of my specialties). While I didn't take pics of the stuff I made earlier, I will post the recipe in a bit, as it is really good, and my kind of comfort food. And I will be sure to take pics of the stuff I make for friday.
Thursday, February 9, 2012
Posting
I have about three posts I am working on right now, all of which need some fine tuning and pictures. But I wanted to make sure I didn't go too long without actually writing something down. :)
Also working on my website, the official "hire me to cook you and your family and your friends" contact info.
And lastly, trying to figure out a name for all this awesome stuff that is going on! I am taking suggestions!
Some things that are important to me when it comes to cooking...I like to cook seasonally. That basically means that I want to use fresh ingredients that are growing right now, as we speak. And although I am not an earthy crunchy person, when it comes to food, I believe that where we live, the seasons we are in, we are provided with the stuff we are supposed to be eating. If you look at winter, everything that is growing in the winter, root veggies, winter squash and hardy greens, lend themselves to thicker and more filling foods. Higher starches equal fuller bellies, which are key to us living though colder months. So that is a big thing for me. That isn't to say I never go off the path, but I would rarely, if ever, serve raw tomatoes in the middle of winter. They taste bad, have an odd texture, and are never going to be as satisfying as they are fresh off the vine at the height of summer.
I also like keeping my eye on current food trends. If used correctly, a "trend" can really brighten up a meal, add a note of wonder and elevate a standard meal into something really special. "Molecular gastronomy" is a huge thing right now, or combining science and cooking (which is funny, because I have always thought that cooking IS science), and is fascinating to study. Foams, "caviar beads", spherification...all very cool. It is something that should be all encompassing or used as an accent, there really is no in-between. I am looking at methods and techniques to add into my usual style of cooking.
Off that branch, I really like surprising people with things they thought they didn't like. I like to tell my friends that they should keep trying things on a regular basis, regardless of their past experience. I began liking olives after Bryan made me drink a martini. It was the most difficult thing to swallow, until finally, at the end of the tunnel, there was this salty little nugget, this bright spot afloat in a boozy lake which, once I found it, was a lifejacket. My love of olives was furthered by working at a restaurant, I would find myself walking up to the bar, waiting for a drink order, and picking up the olive drink garnishes. One for the drink, one for me. Now, I rarely leave a grocery store without a tub of olives from the olive bar. I also hated tomatoes, anchovies, and maybe most surprisingly, stinky cheese. It is rather funny that most of these items are in rotation as some of my favorites.
As for my usual style of cooking? HOME STYLE! While I am British born, New England raised, for some reason, my heart is located in the south. The biggest influence me and my style of cooking has absolutely been my time spent in New Orleans. It says "home" to me. It really is a uniquely American type of food, combining techniques from all of the people that ended up in the area into this amazingly comforting and satisfying culinary experience. And my favorite thing to do with home style cooking is to take it and elevate it. Add a little something to set it apart, while keeping it attainable and unpretentious.
So there are some of the things that are important to me! There are probably 1000 other things, but for now, that is a start. Stay tuned for updates, feel free to drop some ideas on me. Rock on, seize the day, eat some new food!
Friday, February 3, 2012
Condiments I Have Loved...
This is going to be another feature (can I say feature? Am I at the "feature" part of things yet?) that I will be doing on the blog. I love condiments. Love them. Except catsup. Ketchup. whatever. Blergh. But it has a place, AND it can be made better. So in addition to educating us all, including myself, I will be writing about condiments, their history and iterations, and then making them from scratch.
Some of the things I will be talking about, and then recreating, will be:
Mayo
Sriracha
Mustard
Ketchup
Tartar Sauce
Cocktail Sauce
Ranch Dressing
Blue Cheese Dressing
Hot Sauce
Salad Dressings
and more!
Some of the things I will be talking about, and then recreating, will be:
Mayo
Sriracha
Mustard
Ketchup
Tartar Sauce
Cocktail Sauce
Ranch Dressing
Blue Cheese Dressing
Hot Sauce
Salad Dressings
and more!
Dipping Mallows, or the deconstruction of a S'More.
So the chicken breakdown happened, but taking pics was a little too complicated, especially with Jaimee, who, literally within seconds of seeing the chicken, managed to fling the knife onto the floor, grazing her leg. This speaks more to Jaimee's skills over my ability to teach people who to cut apart a chicken. I will do it again soon and have someone there to take some pics.
HOWEVER, I do have a pic of the fun new dessert we created, messy, yummy, gooey marshmallow dippers! Homemade marshmallows are amazing, and i know that not everyone has the time to make them, but they are worth it if you get the chance! Here is what we did, marshmallow recipe from Ina Garten. She says you should wait for it to set overnight, but, as you will see, that is a completely made up rule that you don't need to follow. Unless you want to. But you won't be able to. Because yum.
What goes in:
3 packets of unflavored gelatin
1/2 cup cold water
ANOTHER 1/2 cup of water
1 1/2 cups of light corn syrup
1/4 teaspoon salt
1 tablespoon vanilla extract
confectioners' sugar (dusting the pan/mallows)
1 cup chocolate pieces/chips. I like semisweet, but go with what you like!
1/2 milk, I used skim, cause I had it
pat o' butter, about a tablespoon
1 cup sugar
1/2 cup of peanuts (OR if you are like me and want to mix it up, use "Sweet Cajun" trail mix, which I love and get from Target.
a packet of Graham Crackers
BRITTLE
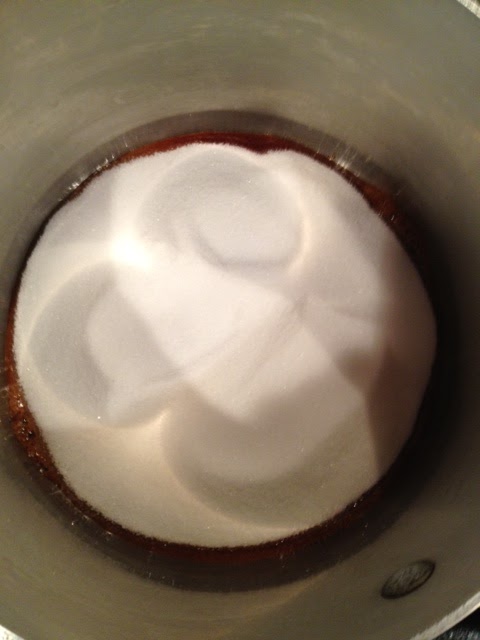
Before you get started, make sure you have all the stuff you need in place. This means, pot on the stove, baking sheet nearby, covered either with silpat (a silicone baking liner, which does not melt with high heat) or non-stick tinfoil (which, until some report comes out in a few years telling me it is horrible stuff, I love), a heatproof stirring utensil (again, silicone is the hero here, I have a silicone spatula).
Take the one cup of sugar, put it in a pot and turn on the heat, medium. You are now making a dry caramel.
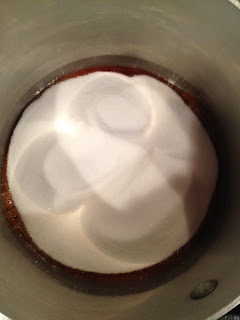
See the edges? MMMMM, caramel. Caramel is one of my favorite things in this world. ESPECIALLY when you add salty things to it. So once your caramel is brown, and you don't see any sugar, turn off the heat and add your half cup of (whatever you are putting in). This is where your heatproof spatula comes into play. After stirring for a little but, pour the mixture (CAREFULLY! Melted sugar is like molten lava. Actually, do me a favor and think of molten lava anytime you make caramel. You don't want this stuff landing on you) on to the sheet pan with the non-stick stuff on it. Put it aside and let it cool.


HOWEVER, I do have a pic of the fun new dessert we created, messy, yummy, gooey marshmallow dippers! Homemade marshmallows are amazing, and i know that not everyone has the time to make them, but they are worth it if you get the chance! Here is what we did, marshmallow recipe from Ina Garten. She says you should wait for it to set overnight, but, as you will see, that is a completely made up rule that you don't need to follow. Unless you want to. But you won't be able to. Because yum.
What goes in:
3 packets of unflavored gelatin
1/2 cup cold water
ANOTHER 1/2 cup of water
1 1/2 cups of light corn syrup
1/4 teaspoon salt
1 tablespoon vanilla extract
confectioners' sugar (dusting the pan/mallows)
1 cup chocolate pieces/chips. I like semisweet, but go with what you like!
1/2 milk, I used skim, cause I had it
pat o' butter, about a tablespoon
1 cup sugar
1/2 cup of peanuts (OR if you are like me and want to mix it up, use "Sweet Cajun" trail mix, which I love and get from Target.
a packet of Graham Crackers
BRITTLE
Before you get started, make sure you have all the stuff you need in place. This means, pot on the stove, baking sheet nearby, covered either with silpat (a silicone baking liner, which does not melt with high heat) or non-stick tinfoil (which, until some report comes out in a few years telling me it is horrible stuff, I love), a heatproof stirring utensil (again, silicone is the hero here, I have a silicone spatula).
Take the one cup of sugar, put it in a pot and turn on the heat, medium. You are now making a dry caramel.
See the edges? MMMMM, caramel. Caramel is one of my favorite things in this world. ESPECIALLY when you add salty things to it. So once your caramel is brown, and you don't see any sugar, turn off the heat and add your half cup of (whatever you are putting in). This is where your heatproof spatula comes into play. After stirring for a little but, pour the mixture (CAREFULLY! Melted sugar is like molten lava. Actually, do me a favor and think of molten lava anytime you make caramel. You don't want this stuff landing on you) on to the sheet pan with the non-stick stuff on it. Put it aside and let it cool.

Brittle!
MARSHMALLOWS
OK, so now time for homemade marshmallows! I keep wanting to write marshMELLOW, which, as spellcheck keeps reminding me, is wrong. I think I need to adjust the way I say it. MALLOW. MA-low. Ok, got it.
Things you will need for this: A candy thermometer and a stand mixer, as well as a lightly dusted with confectioners' sugar 8x11 glass baking dish.
In the bowl of the stand mixer, combine the water and the 3 packages of gelatin. Mix them together, then just let them sit in the bowl while you start mixing the rest of the stuff in the saucepan.
Put the sugar, corn syrup, salt and other half a cup of water into the saucepan, with the candy thermometer attached, turn the heat on medium and wait for the sugar to dissolve. Once it does, turn the heat up high, and keep an eye on it until the thermometer hits 240. The second it does...maybe even the second before it does, take the pan off the heat.
Turn the mixer with the gelatin (which now looks a little solid) on to low and slowly (and let me be honest, I was not great at pouring this slowly, but I didn't pour it in too fast either) pour in the hot liquid. Again, mixer slow, if it is too fast, it will throw the molten sugar mix (see, that came back into play! MOLTEN!) around the kitchen, and probably on you. Or your dogs. Which if they are like mine, are sitting by your feet. Ridiculously inconvenient.
Once the mixture has been poured in, keep the mixer running on low to medium until it starts to thicken up, then turn it on to medium high. Run it for about 15 minutes, and you will start to see it thicken and fluff up. I put the vanilla in at about 13 minutes, I was nervous that it would splash, so when I added it, I turned the mixer on low until it was incorporated.
After the 15 minutes, turn off the mixer, detach it and pour it into the dusted baking dish. Dust the top with some more powdered sugar (you know confectioners' sugar and powdered sugar are the same, right? The interesting thing is it has an anti-caking, or anti-clumping, agent added to it, like corn starch. You can make your own powdered sugar by blending regular sugar in a coffee grinder, but it will obviously not have the anti-caking agent in it, so it might not act exactly the same if it is being used as an actual ingredient, as opposed to a non-sticking-to-the-side-of-the-baking-dish sort of thing.)
SO, Ina told Jaimee and I we should wait overnight for the mallow's to set. But these kinds of rules are in place for people with ridiculous wills of steel. As evidences by our now creating a chocolate dipping sauce
CHOCOLATE DIPPING SAUCE
So easy and it comes out beautiful. Use it for anything you want. Like dipping not fully set marshmallows into it, then dipping those into a brittle/graham cracker crumb thing.
So, you need to make a double boiler. Easy. One sauce pot, one metal mixing bowl. Some water. Done!
Fill the pot with water, less than half way. You don't want the metal mixing bowl to actually touch the water. It needs to fit on top of the sauce pot, not fall it, and be easily removed when you are ready to pour it out. Turn the heat on, you want to boil the water and heat up the metal bowl, basically using indirect heat on the chocolate, which burns pretty easily, to melt it and make some yummy things happen. Put your one cup of chocolate pieces into the bowl, along with the milk and let it start to melt and combine. Don't stir too much, just let thing start happening. When you see it starting to melt, you can begin mixing it a bit. Once it has come together, throw in your pat of butter, and mix it in. Turn off the heat and you have a chocolate dipping sauce!
BRITTLE/GRAHAM CRUMB
Take your brittle, break it up a little, put it in a blender or food processor, add in the package of graham crackers and blast it until it is a crumb. Done!
And here we are! If you are like Jaimee (and Eric) and myself, you will take a spoon, grab some sticky 'mallow, dip it in the chocolate and then dip that into the crumb and nearly die from awesomeness, only to be resuscitated a second later because you realize that there is more and zombies don't eat this awesomeness.

Wednesday, February 1, 2012
Tomorrow...
Deboning a chicken with Jaimee. What what? I have just started deboning and i LOVE it. So be ready for some pics, as well as a recipe for Baked Chicken in a Wine-Mustard sauce. She wants to wear gloves. We shall see. Also, deboning is a word that starts to look funny if you think about it too much. Off to bed.
(Editor's note. And by editor, I mean me.) We didn't debone, we broke down. I like cooking chicken on the bone, it stays juicy and tender. But next, we will debone. It will be done!
(Editor's note. And by editor, I mean me.) We didn't debone, we broke down. I like cooking chicken on the bone, it stays juicy and tender. But next, we will debone. It will be done!
Monday, January 30, 2012
Beet and Celery Root Risotto

(Excuse the ghetto photo, I need to start keeping my big-boy camera near me when I am cooking!)
I am a big fan of risotto. I think it is relatively easy (even though you do have to stir pretty constantly, but stirring shouldn't be a chore, and you can share the responsibility!), and the beauty is, you can then use the leftovers to make risotto cakes! It is also a nice LOOKING dish, and I think that food that looks good automatically tastes better.
Last night I made Beet and Celery Root Risotto to go with my (pressure cooked) short ribs. I knew that the beets would "bleed" into the risotto, giving it a bright pink color, and the "rootiness" of both they and the celery root would be a nice contrast to the fattiness of the short ribs. I also threw in some greens (broccoli rabe) for some color contrast.
When I think of food pairing, I like to cover a wide range between flavors. Earthy can be a nice contrast to fatty, as can bright or acidic. I use wine in my risotto, so there is always a little acidity to it. So now, I have hit three flavor points in one meal! I
While most risotto doesn't take too much preprep, this one needed a little more planning, as I knew I needed to precook the root veggies.
What goes in:
2 beets
1 cup of celery root, cute into cubes
(olive oil and salt for roasting the above two things)
1 cup chopped onions (red, white, yellow, shallots, any of those are cool AND all taste a little different)
1 tablespoon butter
1 tablespoon oil
1 cup arborio rice
1 cup white wine (although I would like to try this with red wine next time)
3 cups broth (veg or chicken for this pairing, often times I use seafood stock) (and chances are, you may not need to use it all)
salt, really depending on how your stock tastes
Parmesan cheese (NOT FROM A CAN, blergh) 1/2 a cup to a cup, grated, depending on how you are feeling
FOR THE ROOTS:
Celery root is awesome. Try it, I implore you. It comes as this big ugly looking thing that smells like...what else...celery. But when it is roasted it gets a little caramelized and mellows out a little. And it isn't really the root of celery, but it is related. Read all about it here: http://en.wikipedia.org/wiki/Celeriac
Set the oven for 325.
After peeling the celery root (and by peeling, I mean using a knife to cut off the brown exterior, much easier than using a peeler), cut the root into cubes, about half an inch. Make a packet of tin foil, throw in the roots with a splash of olive oil and a pinch of salt. Close the packet up and put it on a roasting tray.
Beets are SO easy to cook. Chop of the tops, where the greens (save 'em if you want, throw them out if you don't) and the beet meet. Then put them into (a different) foil packet, same thing, with some oil and a little salt. Don't even bother peeling them. Trust me! Put this packet on the same roasting pan and put them into your 325 preheated oven. Set the timer for 1 hour and 10 minutes. Take a load off! Make a drink! Enjoy your time, you have a while.
Once the timer goes off, pull out the tray, let it sit for a few and cool down. Open the packets (watch out for steam) and put them to the side. You can let the beets cool down a bit but eventually, you want to take them out of the packet and watch as the skin literally peels right off. Beets can stain, so don't get nutty, and if you need gloves, I won't judge. Although I will think you are cooler if you have some beet stained hands. You can also run them under some cold water and scrub the skin off. Once they are peeled, dice them to about the same size as the celery root. Feel free to taste them both to make sure they are seasoned enough, but also, because you deserve a reward!
Roots are done!
FOR THE RICE:
Get a decent sized pot out. I use my (fancy sounding but amazingly reliable) Le Creuset, because it is easy to clean, heats evenly and because I love it. I would recommend a wider sort of vessel, mostly because it helps with stirring AND to make sure that the rice isn't too piled up, getting warmer in one spot over another.
I also recommend warming up your stock. If you use cold stock with the rice, it slows the cooking time down, and you are already spending a good amount of time over the pot, why add to it? You can microwave it (if you are feeling a little lazy) but again, make sure it stays warm. I usually keep it on the stove next to the pot I am cooking the risotto in.
It would also behoove you to have all of your stuff near you; your rice, your wine, your stock, salt, the root veggies, the onions. Once you get started, it is hard to get away for any real amount of time. Or really, any time. You don't want to have burned rice, so just know where everything is ahead of time. Get ready to make a pile of the containers you are using instead of taking the time to go to the sink between dumping things into the pot. This isn't the time. It will get cleaned. The person you are cooking for will clean it. Or at least, they should. You are making them risotto. HOT PINK RISOTTO!
Melt the butter and oil over medium high heat. Once it has melted, toss in the onions and sauté until they are translucent. I have a friend who never really understood what that meant, so for those of you not in the know, it means until it is slightly see through. Not like cellophane, more like thick tissue paper. Once you are happy with how it looks, take your rice and put it in with the onions and butter-oil. You are basically toasting the rice now, giving it some depth. We can discuss later what that means, but once you get the idea of "depth" in cooking, things will start to look up for you. Start stirring the rice, making sure it is coated with the oil-butter-onion mix. I would do this for about a minute, maybe a minute and a half. The other thing this does is prevent the rice from sticking and becoming a big clumpy mess.
Now it is time to start adding the liquid. Your wine (room temp) goes in first. Once you pour that in, you start stirring. Stir. And stir more. Keep stirring. Eventually (a few minutes, 2 or 3) the wine will be absorbed into the rice, and you will start to see the beginnings of your risotto! Now, add one cup of your warm stock, and stir some more. Again, like magic, the rice absorbs it! You will start to notice, for every cup of liquid you add, it takes the rice a little longer to absorb it. The idea is to have a rice that is sort of liquidy, yet still a little starchy. As I have learned (from eating out and watching Top Chef), risotto is meant to spread when it is plated, not pile up.
Add another cup of liquid. Stir. You should still have a cup of stock left. This is when I add my root veggies. Keep stirring! Almost done!
Add the last of the liquid! As I mentioned earlier, I can't tell you exactly how much you will use, but it should be pretty close to the whole amount. Cooking depends on a bunch of factors, but really, the important thing is that you enjoy what you are eating. Don't get bogged down in the details. Unless you are making a cake. Oy, measuring.
Now, the liquid should be pretty absorbed, your risotto should be a shocking pink color and you should turn off the heat. Grab your grated cheese (or you can grate it directly into the pan) and stir it together with the risotto.
Experimenting with ideas!
Over the next couple weeks, to get myself confident in feeding people for a living, I am going to go through my "food idea" notebook and make some of the random, crazy thoughts I write down into actual dishes.
Here are some of the things I am going to be working on (some are more seasonal, but nothing wrong with practicing ahead of the summer bounty):
Potato / Chorizo Puffs
Mini Puff Apple (Fruit) Pies
Chowder Pot Pie
Fried Oysters crusted with Spicy Cheetos
Pork, Pork and More Pork (Pork, breaded with Pork Rinds, seared with Bacon)
Snow Pea Slaw
Sweet Corn Gazpacho, Sweet Corn Bisque
Mongolian Beef Short Ribs / Mongolian Pork
Root Beer Syrup
Pear / Blue Cheese Pie (or App)
Bacon / Apple / Cheddar Pies
Cucumber (Lime / Melon / Honey) Sorbet
Trail Mix Brittle
Salts! (Arugula, Cherry, Cherry Cola, Coffee, Citrus)
Anything to add? Anything sound good? Anyone want to come over and be a taster? This is not a comprehensive list, but a beginning. Seriously, I write some crazy stuff down.
Wednesday, January 25, 2012
What is "Throwing Spaghetti at the Wall" (or "Man Without a Plan, No More!")
For a long time now, I have been a man without purpose. Without a firm direction. There are many things I love in this world, but not many of those were things that I could easily translate into a career. I love art, comic books, reading. I am well-versed in all things pop culture. I can easily discuss the meaning behind song lyrics and the beauty of Hitchcock movies until I am blue in the face. But to convey those skills into something that was both fulfilling to me AND I could base a career around...it wasn't happening.
But over the years one thing kept coming back to me. It is hard for me to pat myself on the back, but (according to my friends and family at least) it seems as though I am a pretty good cook. I know my way around the kitchen, know how to read a recipe, can figure out flavor combinations. I have always been a fan of food and eating, never shying away from a challenge. I was raised in a house where I was never forced to try anything, but always did. I understand that tastes change, both personally and culturally. Fads come and go, foams and reductions, pop-up restaurants and food trucks. Right now I think we are lucky to live in a time where there is a huge focus on farm to table eating. Fresher produce, locally sourced foods, we are eating well these days.
But over the years one thing kept coming back to me. It is hard for me to pat myself on the back, but (according to my friends and family at least) it seems as though I am a pretty good cook. I know my way around the kitchen, know how to read a recipe, can figure out flavor combinations. I have always been a fan of food and eating, never shying away from a challenge. I was raised in a house where I was never forced to try anything, but always did. I understand that tastes change, both personally and culturally. Fads come and go, foams and reductions, pop-up restaurants and food trucks. Right now I think we are lucky to live in a time where there is a huge focus on farm to table eating. Fresher produce, locally sourced foods, we are eating well these days.
So. What am I doing writing this in a blog?
The idea behind this blog is to follow my journey on translating my love of food into a satisfying career. I will be posting ideas, some recipes, some tips, and photos of the day to day stuff that I do in hopes of teaching people how to eat well and give folks a new appreciation for food.
The idea behind this blog is to follow my journey on translating my love of food into a satisfying career. I will be posting ideas, some recipes, some tips, and photos of the day to day stuff that I do in hopes of teaching people how to eat well and give folks a new appreciation for food.
Soon, I will be putting myself out there and cooking for folks. This will be the forum where I talk about my attempts to do what I love and love what I do. Hopefully if you are reading this, you will learn some stuff! And I hope my posts come across with passion and a love for all things food. If so, feel free to get in touch. I would love to cook for you, show you a few things in the kitchen, and overall, expand some horizons for you!
Much thanks!
JT
Subscribe to:
Comments (Atom)