Here is what I am cooking for people this week:
Italian Meatloaf (I have a feeling this will be popular)
Roasted Veggies (We will see what looks good)
Root Veggie Gratin (w/ Gruyere)
Something with Couscous, haven't decided yet.
Some Key Lime Pies
I also need to get a brisket to cure, since I want to make my own Corned Beef for St. Patrick's day. Mmmmm, corned beef.
Monday, February 27, 2012
Wednesday, February 22, 2012
Meatloaf, Italian Style
Meatloaf has always been one of my favorites, I absolutely went to school with meatloaf sandwiches on more than one occasion as a kid. And I have a high level of disdain for ketchup (blergh), which is not used in this recipe, although I am sure you can sub it out for the tomato sauce. I should also mention, this is modified from a recipe I read in Bon Appetit, from, of all places, Mario Batalli's father, who I believe runs a restaurant. This makes two loaves of meat, so cut it in half if you want less, but you can always freeze the second one. I would probably undercook it a little, and when thawing, take it out the day before.
What goes in:
2 lbs lean ground beef (15 to 20 percent fat)
1 lb grated fresh mozzerella (i usually put it in the freezer to firm it up a bit more, not more than half an hour)
1 lb sweet Italian sausage, crumbled, out of the casing
2 c fresh basil (as it was out of season, I used a little basil in a tube. Don't hate. About half a cup)
2 c fresh breadcrumbs (from bread you made! Kidding, I am trying to make up for the basil in a tube)
1 medium onion, chopped
1 c oil packed sun-dried tomatoes, drained, chopped
1/2 c diced red pepper
6 garlic cloves, chopped
1 1/2 tbsp dried oregano
2 tsp salt
1 tsp pepper
1 cup tomato sauce (1/2 for in the meatloaf, 1/2 for the top)
3 large eggs, beaten a little
1/2 c dry red wine (some examples of dry red wines are Zinfandel, Cab Sauvignon, Bordeaux, Pinot Noir, Côtes-du-Rhône. Also, DON'T COOK WITH A WINE YOU WOULDN'T DRINK!!! Or serve others. SERIOUSLY!)
MEATLOAF
OK, as always, get your stuff ready to go. I don't think I have talked about the importance of the mise-en-place (sounds like meez on ploss). This is a french term which literally means "stuff in place" and is invaluable in the kitchen. So get your stuff ready, your onions chopped, your garlic minced, your tomatoes cut up. Beat the eggs, pour the wine, grate your mozz. Getting into a mindset of making your mise-en-place and having it ready to use is a good way to cook.
The recipe didn't suggest cooking the onions, but after having made the recipe a few times, I decided I wanted a little caramelization in the loaf, so now I sauté the onions, the peppers, AND to merge the flavors a little, and mellow some of their strength, I throw in the sun-dried tomatoes. I cook them for just a little bit, getting a little color onto the onions. I don't add the garlic, it is small enough that it cooks pretty nicely inside the meatloaf.
Start combining! I let the cooked veggies cool a bit before adding them, but since it was going into the oven right away, no big deal, other than not wanting to burn my hands. At this point, you can turn your oven to 375°, and get your two loaf pans ready to go. More on that later. Mix all the non-liquids first, then take half the tomato sauce, the eggs, and the red wine and put them in and mix mix mix!
Don't over mix! It makes things tough!
Now for the pans, you can use them or not. This recipe filled two bread loaf pans, or you can do it free form on a baking sheet. Either way works. Just be shore, if you just make a loaf without a pan, there will be some oil and liquids coming out, so put some non-stick foil on the bottom of your baking sheet. Once they are formed, put the rest of the tomato sauce on the top of the loaves. Open the ovens, put in the loaves. Once you have let the loaves bake for about an hour and fifteen minutes, they should be done!! You can drain out the loaf pans once they have cooled.
YUM! Make a sandwich the next day with the leftovers! My favorite was always meat loaf sandwiches!
Tuesday, February 14, 2012
Happenings!
I dropped of my first meal for someone yesterday, which was pretty cool! It marks the first time I have made food and left it behind, like a little food baby. I was nervous, but received an email today saying how great the food was, AND had a follow up email from someone else in the office asking me to cook for a dinner party they want to have!
So for the first meal, I made meatloaf (it was requested) with mashed potatoes, gravy, and sauteed kale with some bacon. And she ordered for friday, mac and cheese, shrimp etouffee, pork bbq, and for dessert, key lime pie (one of my specialties). While I didn't take pics of the stuff I made earlier, I will post the recipe in a bit, as it is really good, and my kind of comfort food. And I will be sure to take pics of the stuff I make for friday.
So for the first meal, I made meatloaf (it was requested) with mashed potatoes, gravy, and sauteed kale with some bacon. And she ordered for friday, mac and cheese, shrimp etouffee, pork bbq, and for dessert, key lime pie (one of my specialties). While I didn't take pics of the stuff I made earlier, I will post the recipe in a bit, as it is really good, and my kind of comfort food. And I will be sure to take pics of the stuff I make for friday.
Thursday, February 9, 2012
Posting
I have about three posts I am working on right now, all of which need some fine tuning and pictures. But I wanted to make sure I didn't go too long without actually writing something down. :)
Also working on my website, the official "hire me to cook you and your family and your friends" contact info.
And lastly, trying to figure out a name for all this awesome stuff that is going on! I am taking suggestions!
Some things that are important to me when it comes to cooking...I like to cook seasonally. That basically means that I want to use fresh ingredients that are growing right now, as we speak. And although I am not an earthy crunchy person, when it comes to food, I believe that where we live, the seasons we are in, we are provided with the stuff we are supposed to be eating. If you look at winter, everything that is growing in the winter, root veggies, winter squash and hardy greens, lend themselves to thicker and more filling foods. Higher starches equal fuller bellies, which are key to us living though colder months. So that is a big thing for me. That isn't to say I never go off the path, but I would rarely, if ever, serve raw tomatoes in the middle of winter. They taste bad, have an odd texture, and are never going to be as satisfying as they are fresh off the vine at the height of summer.
I also like keeping my eye on current food trends. If used correctly, a "trend" can really brighten up a meal, add a note of wonder and elevate a standard meal into something really special. "Molecular gastronomy" is a huge thing right now, or combining science and cooking (which is funny, because I have always thought that cooking IS science), and is fascinating to study. Foams, "caviar beads", spherification...all very cool. It is something that should be all encompassing or used as an accent, there really is no in-between. I am looking at methods and techniques to add into my usual style of cooking.
Off that branch, I really like surprising people with things they thought they didn't like. I like to tell my friends that they should keep trying things on a regular basis, regardless of their past experience. I began liking olives after Bryan made me drink a martini. It was the most difficult thing to swallow, until finally, at the end of the tunnel, there was this salty little nugget, this bright spot afloat in a boozy lake which, once I found it, was a lifejacket. My love of olives was furthered by working at a restaurant, I would find myself walking up to the bar, waiting for a drink order, and picking up the olive drink garnishes. One for the drink, one for me. Now, I rarely leave a grocery store without a tub of olives from the olive bar. I also hated tomatoes, anchovies, and maybe most surprisingly, stinky cheese. It is rather funny that most of these items are in rotation as some of my favorites.
As for my usual style of cooking? HOME STYLE! While I am British born, New England raised, for some reason, my heart is located in the south. The biggest influence me and my style of cooking has absolutely been my time spent in New Orleans. It says "home" to me. It really is a uniquely American type of food, combining techniques from all of the people that ended up in the area into this amazingly comforting and satisfying culinary experience. And my favorite thing to do with home style cooking is to take it and elevate it. Add a little something to set it apart, while keeping it attainable and unpretentious.
So there are some of the things that are important to me! There are probably 1000 other things, but for now, that is a start. Stay tuned for updates, feel free to drop some ideas on me. Rock on, seize the day, eat some new food!
Friday, February 3, 2012
Condiments I Have Loved...
This is going to be another feature (can I say feature? Am I at the "feature" part of things yet?) that I will be doing on the blog. I love condiments. Love them. Except catsup. Ketchup. whatever. Blergh. But it has a place, AND it can be made better. So in addition to educating us all, including myself, I will be writing about condiments, their history and iterations, and then making them from scratch.
Some of the things I will be talking about, and then recreating, will be:
Mayo
Sriracha
Mustard
Ketchup
Tartar Sauce
Cocktail Sauce
Ranch Dressing
Blue Cheese Dressing
Hot Sauce
Salad Dressings
and more!
Some of the things I will be talking about, and then recreating, will be:
Mayo
Sriracha
Mustard
Ketchup
Tartar Sauce
Cocktail Sauce
Ranch Dressing
Blue Cheese Dressing
Hot Sauce
Salad Dressings
and more!
Dipping Mallows, or the deconstruction of a S'More.
So the chicken breakdown happened, but taking pics was a little too complicated, especially with Jaimee, who, literally within seconds of seeing the chicken, managed to fling the knife onto the floor, grazing her leg. This speaks more to Jaimee's skills over my ability to teach people who to cut apart a chicken. I will do it again soon and have someone there to take some pics.
HOWEVER, I do have a pic of the fun new dessert we created, messy, yummy, gooey marshmallow dippers! Homemade marshmallows are amazing, and i know that not everyone has the time to make them, but they are worth it if you get the chance! Here is what we did, marshmallow recipe from Ina Garten. She says you should wait for it to set overnight, but, as you will see, that is a completely made up rule that you don't need to follow. Unless you want to. But you won't be able to. Because yum.
What goes in:
3 packets of unflavored gelatin
1/2 cup cold water
ANOTHER 1/2 cup of water
1 1/2 cups of light corn syrup
1/4 teaspoon salt
1 tablespoon vanilla extract
confectioners' sugar (dusting the pan/mallows)
1 cup chocolate pieces/chips. I like semisweet, but go with what you like!
1/2 milk, I used skim, cause I had it
pat o' butter, about a tablespoon
1 cup sugar
1/2 cup of peanuts (OR if you are like me and want to mix it up, use "Sweet Cajun" trail mix, which I love and get from Target.
a packet of Graham Crackers
BRITTLE
Before you get started, make sure you have all the stuff you need in place. This means, pot on the stove, baking sheet nearby, covered either with silpat (a silicone baking liner, which does not melt with high heat) or non-stick tinfoil (which, until some report comes out in a few years telling me it is horrible stuff, I love), a heatproof stirring utensil (again, silicone is the hero here, I have a silicone spatula).
Take the one cup of sugar, put it in a pot and turn on the heat, medium. You are now making a dry caramel.
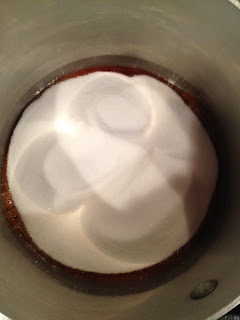
See the edges? MMMMM, caramel. Caramel is one of my favorite things in this world. ESPECIALLY when you add salty things to it. So once your caramel is brown, and you don't see any sugar, turn off the heat and add your half cup of (whatever you are putting in). This is where your heatproof spatula comes into play. After stirring for a little but, pour the mixture (CAREFULLY! Melted sugar is like molten lava. Actually, do me a favor and think of molten lava anytime you make caramel. You don't want this stuff landing on you) on to the sheet pan with the non-stick stuff on it. Put it aside and let it cool.


HOWEVER, I do have a pic of the fun new dessert we created, messy, yummy, gooey marshmallow dippers! Homemade marshmallows are amazing, and i know that not everyone has the time to make them, but they are worth it if you get the chance! Here is what we did, marshmallow recipe from Ina Garten. She says you should wait for it to set overnight, but, as you will see, that is a completely made up rule that you don't need to follow. Unless you want to. But you won't be able to. Because yum.
What goes in:
3 packets of unflavored gelatin
1/2 cup cold water
ANOTHER 1/2 cup of water
1 1/2 cups of light corn syrup
1/4 teaspoon salt
1 tablespoon vanilla extract
confectioners' sugar (dusting the pan/mallows)
1 cup chocolate pieces/chips. I like semisweet, but go with what you like!
1/2 milk, I used skim, cause I had it
pat o' butter, about a tablespoon
1 cup sugar
1/2 cup of peanuts (OR if you are like me and want to mix it up, use "Sweet Cajun" trail mix, which I love and get from Target.
a packet of Graham Crackers
BRITTLE
Before you get started, make sure you have all the stuff you need in place. This means, pot on the stove, baking sheet nearby, covered either with silpat (a silicone baking liner, which does not melt with high heat) or non-stick tinfoil (which, until some report comes out in a few years telling me it is horrible stuff, I love), a heatproof stirring utensil (again, silicone is the hero here, I have a silicone spatula).
Take the one cup of sugar, put it in a pot and turn on the heat, medium. You are now making a dry caramel.
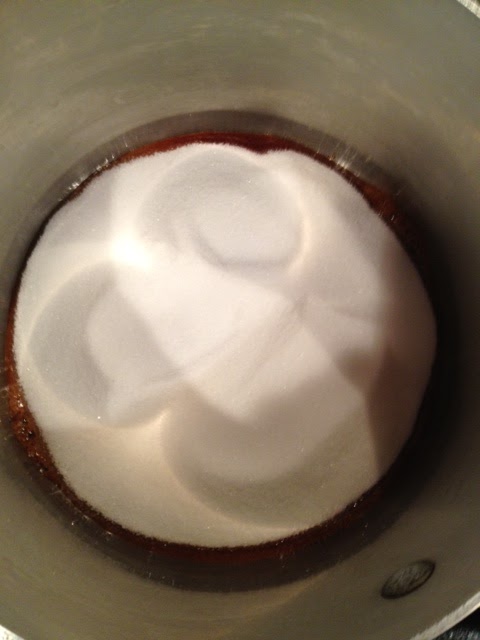
See the edges? MMMMM, caramel. Caramel is one of my favorite things in this world. ESPECIALLY when you add salty things to it. So once your caramel is brown, and you don't see any sugar, turn off the heat and add your half cup of (whatever you are putting in). This is where your heatproof spatula comes into play. After stirring for a little but, pour the mixture (CAREFULLY! Melted sugar is like molten lava. Actually, do me a favor and think of molten lava anytime you make caramel. You don't want this stuff landing on you) on to the sheet pan with the non-stick stuff on it. Put it aside and let it cool.

Brittle!
MARSHMALLOWS
OK, so now time for homemade marshmallows! I keep wanting to write marshMELLOW, which, as spellcheck keeps reminding me, is wrong. I think I need to adjust the way I say it. MALLOW. MA-low. Ok, got it.
Things you will need for this: A candy thermometer and a stand mixer, as well as a lightly dusted with confectioners' sugar 8x11 glass baking dish.
In the bowl of the stand mixer, combine the water and the 3 packages of gelatin. Mix them together, then just let them sit in the bowl while you start mixing the rest of the stuff in the saucepan.
Put the sugar, corn syrup, salt and other half a cup of water into the saucepan, with the candy thermometer attached, turn the heat on medium and wait for the sugar to dissolve. Once it does, turn the heat up high, and keep an eye on it until the thermometer hits 240. The second it does...maybe even the second before it does, take the pan off the heat.
Turn the mixer with the gelatin (which now looks a little solid) on to low and slowly (and let me be honest, I was not great at pouring this slowly, but I didn't pour it in too fast either) pour in the hot liquid. Again, mixer slow, if it is too fast, it will throw the molten sugar mix (see, that came back into play! MOLTEN!) around the kitchen, and probably on you. Or your dogs. Which if they are like mine, are sitting by your feet. Ridiculously inconvenient.
Once the mixture has been poured in, keep the mixer running on low to medium until it starts to thicken up, then turn it on to medium high. Run it for about 15 minutes, and you will start to see it thicken and fluff up. I put the vanilla in at about 13 minutes, I was nervous that it would splash, so when I added it, I turned the mixer on low until it was incorporated.
After the 15 minutes, turn off the mixer, detach it and pour it into the dusted baking dish. Dust the top with some more powdered sugar (you know confectioners' sugar and powdered sugar are the same, right? The interesting thing is it has an anti-caking, or anti-clumping, agent added to it, like corn starch. You can make your own powdered sugar by blending regular sugar in a coffee grinder, but it will obviously not have the anti-caking agent in it, so it might not act exactly the same if it is being used as an actual ingredient, as opposed to a non-sticking-to-the-side-of-the-baking-dish sort of thing.)
SO, Ina told Jaimee and I we should wait overnight for the mallow's to set. But these kinds of rules are in place for people with ridiculous wills of steel. As evidences by our now creating a chocolate dipping sauce
CHOCOLATE DIPPING SAUCE
So easy and it comes out beautiful. Use it for anything you want. Like dipping not fully set marshmallows into it, then dipping those into a brittle/graham cracker crumb thing.
So, you need to make a double boiler. Easy. One sauce pot, one metal mixing bowl. Some water. Done!
Fill the pot with water, less than half way. You don't want the metal mixing bowl to actually touch the water. It needs to fit on top of the sauce pot, not fall it, and be easily removed when you are ready to pour it out. Turn the heat on, you want to boil the water and heat up the metal bowl, basically using indirect heat on the chocolate, which burns pretty easily, to melt it and make some yummy things happen. Put your one cup of chocolate pieces into the bowl, along with the milk and let it start to melt and combine. Don't stir too much, just let thing start happening. When you see it starting to melt, you can begin mixing it a bit. Once it has come together, throw in your pat of butter, and mix it in. Turn off the heat and you have a chocolate dipping sauce!
BRITTLE/GRAHAM CRUMB
Take your brittle, break it up a little, put it in a blender or food processor, add in the package of graham crackers and blast it until it is a crumb. Done!
And here we are! If you are like Jaimee (and Eric) and myself, you will take a spoon, grab some sticky 'mallow, dip it in the chocolate and then dip that into the crumb and nearly die from awesomeness, only to be resuscitated a second later because you realize that there is more and zombies don't eat this awesomeness.

Wednesday, February 1, 2012
Tomorrow...
Deboning a chicken with Jaimee. What what? I have just started deboning and i LOVE it. So be ready for some pics, as well as a recipe for Baked Chicken in a Wine-Mustard sauce. She wants to wear gloves. We shall see. Also, deboning is a word that starts to look funny if you think about it too much. Off to bed.
(Editor's note. And by editor, I mean me.) We didn't debone, we broke down. I like cooking chicken on the bone, it stays juicy and tender. But next, we will debone. It will be done!
(Editor's note. And by editor, I mean me.) We didn't debone, we broke down. I like cooking chicken on the bone, it stays juicy and tender. But next, we will debone. It will be done!
Subscribe to:
Comments (Atom)